Showing posts with label made from scratch. Show all posts

Thursday, September 23, 2010

Freezer Meals

When I was pregnant with "L" I decided I was going to make as many meals ahead as possible. When I got to looking up "freezer meals" online I was amazed at the variety and simplicity of it! In the last month or two of my pregnancy I was able to make and freeze about 18 meals in total. It was a God send after she was born! With many a sleepless night dealing with a very high needs baby by myself when Zach went back to working (he works nights), the premade meals made things so much easier! I still use freezer meals now on at least a once a week basis. They are quick, easy and save me from breaking down and ordering pizza!
So, a tutorial on what a freezer meal is, how to make them, ideas on what to make, how to freeze them, how to thaw them, and how to cook them. :o) This could be a long one!

A freezer meal is:
This is fairly simple to answer. A freezer meal is a meal in the freezer. Got it? :o) Ok, maybe a little more in depth. Freezer meals can be casseroles, enchiladas, lasagna, premade pizza dough, precooked meat, freezer marinades, meat loaves, soups, pot pies and even breads/rolls/biscuits.

How to make, freeze, thaw and cook the different types of freezer meals:

  • Casseroles: This week, make a casserole but double the recipe. Put the second batch in a disposable foil pan and place in the freezer. Uncooked! Now you have a freezer meal. This can be done with casseroles, lasagna, stuffed shells, mac and cheese, meat loaves, pot pies and enchiladas. You can buy foil pans for really cheap that have plastic covers that stack nicely in a freezer. Write on the lid of the container the bake temperature, time and any special instructions (Ie: add 1 cup shredded cheese to the top the last 5 minutes of bake time.) Also write on the lid what goes good with the casserole (Ie: for baked spaghetti: serve with green beans, salad, sliced peaches, and garlic bread.) To cook: allow the casserole to thaw for about 24 hours in the refrigerator. Bake at the time and temperature on the lid and serve!

  • Pizza dough: make a double batch of pizza dough (I love my bread machine!) Roll out your pizza crusts, poke holes in the bottom with a fork and bake for 10 minutes at 350 degrees. Place baked crusts on a flat surface to cool then place in a zip top baggie or wrap in plastic wrap and place in the freezer. I like to do these in personal sized pizzas so we can have a few different types of toppings (meat lovers, peppers and onions, tomato basil mozzarella.) When you are ready to make them, pull the crusts out, unwrap and allow to thaw on your baking sheet for 10-15 minutes while your oven is preheating. Place on your toppings of choice including cheese. Put in a 350 degree oven for 10-15 minutes till the cheese is melted and the crust is golden brown. These have been a lifesaver more than once for us! Times when we get home from being gone all day and there is nothing in the house to eat that is quick. Within a half an hour I can have hot pizza with a side salad and maybe some green beans ready to go.

  • Precooked meats are nice too. When I have a recipe that calls for diced cooked chicken, I always cook twice the amount. Pull out what you don't need for that recipe and throw it into zip top baggies in 1-2 cup amounts for later use. These are nice for salads! Also, breakfast sausage is a great cook ahead meat. Buy the bulk ground sausage (cheaper than the premade patties) and cook it all up in patties like you normally would for breakfast. Just cook double or however much you bought. Lay the cooked patties on a cookie sheet lined with wax paper and place in the freezer for a few hours. Now you have precooked sausage patties for breakfast. In a hurry one morning, pop a couple in the microwave while your eggs are cooking. Or place on a biscuit/bagel with some cheese for an "egg McWhatever" to go. Also, when you buy a package of bacon, split it up into serving sizes to fit your family (3 slices per person in the family kinda deal) and freeze these uncooked like you do the cooked patties. Then when you need bacon you are only thawing out the amount needed!

  • Freezer marinades are a nice one. Buy a big bag of chicken breasts or a family sized package of beef cut however you like it when they are on sale. I have been told you can do this with tofu as well. (Hi Andi!) Divide the meat into zip top baggies in the portions you need for your family (4 people in your family, 4 chicken breasts in the baggie.) Pour in your favorite marinade. This can be store bought or homemade. Then place in the freezer. When you are ready to use them, put the baggie in a large bowl in the refrigerator for a few days to thaw. As the meat thaws it will marinade by itself. Cook as you normally would!

  • Soups: Make a big pot of chili or veggie soup, pull out half and freeze in a large container or zip top baggie. Or freeze in individual portions for a quick meal. Simply thaw and reheat on the stove!

  • Breads/rolls/biscuits: Make up your bread/rolls as usual. Allow to rise for the final time. Then bake for about 3/4 of the time you usually do. You are looking to get them to the point of being baked completely but not browned. Allow to cool completely and then place in a freezer bag. When you want to use them, allow them to thaw and then bake for the last 1/4 amount of time. You now have "Brown and Serve" bread just like from the store! Biscuits can be done like for the bread or they can be mixed up, cut out and then frozen unbaked. Allow them to thaw most of the way and then bake as usual, though you may need to increase the time a bit.

  • Other ideas: 1:)Have a favorite crock pot recipe? Mix up a double batch of the ingredients next time you make it. Freeze one half of the uncooked ingredients for later use. Just like those expensive store bought ones. 2) Next time you have a meal that calls for diced onion, cut up a couple extra while you have the knife and cutting board out. Place in snack size freezer bags and use when you are in a hurry. 3) Buy bell peppers when they are on sale/in season. Wash, core and slice/dice them, place on a cookie sheet lined with wax paper and freeze over night. Next time you want a pepper omelet in the morning, pull out a hand full, toss in the microwave for 30 seconds or so and then add them in. Or if you have a recipe that calls for one pepper pull out a big handful (a large handful of sliced peppers for me is about equivalent to 1 whole pepper). 4) Short breads (muffins, banana nut bread, Amish friendship bread, ect.- those that do not use yeast but do use baking soda/powder) can be frozen after baking. These freeze wonderfully! Bake a big batch of your favorite muffins and then freeze the extra. In the morning, simply pull one out, warm it up in the oven or microwave, butter and enjoy! Bake a big batch of banana nut bread when "too old" bananas go on sale for $.20 a pound. Freeze the extra loaves. Thaw for a few hours and you have "fresh" bread that tastes as good as the day you made it. Honestly, freezer zucchini bread in the middle of winter has always tasted better to me than fresh baked.

I hope this gives you some helpful tips on how to make make ahead meals. Making meals from scratch can be a time consuming, tiring, and labor intensive process, but by doing a little thinking ahead, a little extra work here and there, and spending a few extra minutes at each meal, you can make it much easier and tastier!

Saturday, August 7, 2010

First canning of the season!

Today I spent the day by taking a trip to the farmers market and then canning what I bought. I purchased 15 cucumbers of various sizes and 4 pounds of apples. All for about $5.00! Add that to the cucumbers I had picked from our plants and this is what I came up with!
That comes out to 13 jars of dill pickles- 5 sliced, 5 spears and 3 whole. And then 4 jars of peach applesauce. Not pictured are 5 jars of blueberry syrup. Plus 3/4 of a jar in the fridge for pancakes tomorrow. The blueberries were just bought at the grocery store but now I won't have to mess with making syrup anytime we want pancakes, waffles or sweet rolls.
I am looking forward to enjoying these lovelies this winter! And to much more canning this summer when our tomatoes come on and this fall when apples come on big time. I do so love canning the bounty God graciously give us!

Tomato, basil, mozerrlla pasta


Another wonderful, simple, whole foods meal recipe!


Who ever first decided to mix these things together should win an award!


Ingredients:

1 large tomato per person

1 cup dry pasta per person (what ever type you like)

diced block mozzarella cheese, to your liking (you can also use fresh cheese or shredded cheese)

dried or fresh basil, again to your liking (oregano is also good)


Put the pasta on to boil in a medium sized sauce pan. While this is cooking, dice your tomatoes and cheese and (if using fresh) mince up the herbs. When the pasta is al dente, pour into a colander. While the pasta is draining well, place the tomatoes and herbs in the pan. Cook on medium till heated through, falling apart, and fragrant. Add in the cheese and the pasta. Cook till the cheese is starting to melt. Dish into a bowl and enjoy! This also makes a nice cold salad.

Tuesday, July 27, 2010

Roasted chicken and veggies


Lunch today was baked/roasted chicken, potatoes, carrots and onions. It is a simple, easy, yummy meal so I figured I'd share! I would live to do more recipes like this where I walk you through step by step on how to make a simple meal. Just to show that you can make a good, healthy whole foods meal without too much effort. In total the prep time is probably 30 minutes! Then you can just sit back and relax while it is cooking, all in one pan!

I washed the potatoes and peeled the carrots and then cut them into a little bigger than bite sized pieces. I did the same with the onion. Place all those in a 9X13 inch pan, drizzle with olive oil. I then sprinkled on dried oregano and rosemary and powdered garlic. But please feel free to use what ever tastes good to you! Put that in the oven to bake while you get the chicken ready.

Skin a whole chicken. You can leave the skin in if you like, I just don't like. :o) Then cut it up into 8 pieces (2 legs, 2 thighs, 2 wings, 2 breasts). By the time this is done, the veggies will have begun to cook nicely. (You could skip the step and use a pre-cut up chicken or your favorite chicken parts- chicken breasts, legs and thighs, etc.)

Pull the pan out of the oven and stir the veggies. Place the chicken on top of the veggies and sprinkle with the herbs and seasonings. Place back in the oven to cook till done. Should take between 30-45 minutes. Till the chicken temps between 165-180.

Mean while, place the chicken carcass in a large pot and cover with water. Put a lid on it and place on the stove. Add seasonings if you wish but it is not necessary. Allow to simmer on the stove for 2-how ever many hours! :o) When done, pull the chicken from the water and allow to cool on a plate for a bit then using your hands, pick off any bits of meat you can find. Add to the chicken broth and place in quart sized zip top baggies (I usually do about 2 cups per bag). Lay them down on a cookie sheet and place in the freezer over night to get solid.

Now you have a nice meal and chicken broth for later use!

Monday, July 26, 2010

This is me!

I am a house wife. A stay-at-home mom. A home maker. I stay at home because we (Zach and I) made that decision a long time ago. It was not a decision we made lightly. We thought long and hard about it. There were many nights spent talking about it into the wee hours of the morning. There still are. We knew that by making this choice we would never own a brand new car or house. We knew we wouldn't be able to buy things just because we wanted them. But we don't want that either. We have to think about making our purchases. We have to save up. We have to pinch pennies. But we find those things fun, challenging, exciting even.

I do not feel I need to justify my not having a job. I do things here and there to bring in a little extra money on occasion but not because I feel I should but because I want to. Not because I have to but because I choose to. My husband is able to support us. Would a second income be helpful, sure! But it is not necessary. We don't need it, nor do we want it. We would much rather I be here. Taking care of our home, our children, and ourselves. And I do work. I work hard. I do not sit on the couch watching soap operas all day eating bon bons while filing my nails. I cook, plan meals, grocery shop, clean, do dishes, do laundry, play with my girl, garden (veggies), and make as much as I can from scratch (pie dough, pizza, bread, yogurt, casseroles, granola, baking mix, cream of chicken soup, gravy, chicken broth, pasta, desserts, pie filling, laundry soap). Could I buy most of those things from a store, sure! But I save us a lot of money by making them from scratch and they are much healthier. Could I do those things and still have a job, sure but maybe not as well or with as much attention to detail.

Have we chosen the hard life? In some peoples eyes, sure. But not in ours. We live a simple existence. We don't go out to eat for our birthdays and anniversary. Instead I make a favortie meal and dessert. We don't go out to the movies. Instead we head the the library and borrow a movie for free. We don't buy new clothes. Instead we shop at Goodwill, consignment shops, thrift stores, and yard sales. We don't go to high dollar salons. Instead I cut my husbands hair and I get mine cut at a beauty college for about $5. We don't buy pricey diapers. Instead we cloth diaper and use store brand disposables. We don't go on big vacations. Instead we go camping or to local parks and historical sites and maybe once every 5 years or so take a bigger trip. Still costing us no more than $500 or so.We live a reusable life instead of a disposable one. We use rags instead of Swifer dusters, sponges, paper towels. We use cloth napkins, cloth diapers, and towels. I am looking into using handkerchiefs this winter instead of tissues. Heck, I even use cloth "female products." Sorry guys!

Are we happy? For the most part, yes. Do we want more? Sure! Who doesn't? We want a home of our own. Land. A place to raise our children. In the country. A place for goats, chickens, maybe even a couple sheep. A place to grow, run, learn, live, breath! But we are willing to wait for that to happen. To slowly build up our savings. Are we planning to buy a quarter of a million dollar home? NO! Not by any means. An old farm house with a couple out buildings and a couple few acres would be fine with us.

Please don't get me wrong. I am not knocking those that do work! Both those that choose to and have to. I am not saying that it makes you a lesser wife, mother, father, husband, person! Not by any means. I am just stating our decision and why and how we make this decision possible. I can not count the number of times I have been looked down on because I choose to stay home. How many people have told my husband that I should get off my lazy good for nothing butt and get a job. And it hurts me. That people cannot accept the decision we have made.

We both sacrifice to make this choice possible for us. Zach works hard! He works a hard, physical job and comes home tired every morning. He works third shift so he can earn an extra dollar an hour. And this means that he is on a different sleep schedule as "L" and I. He gets home from work at 7am and goes to bed. We get up at 8am. He then gets up at 1 or 1:30 pm (after only 6 or so hours of sleep) to spend time with us. He then leaves for work at 5pm. We don't even eat a meal together the days that he works.

And how do I sacrifice? I miss my husband! I see him a matter of 3-4 hours a day on the days he works. And those hours he is tired and half out of it. I don't always get to buy the things that I want or "need". I am tired. Mentally, physically and often times emotionally.

But we are happy. So why can't people just be happy for us? Because we don't want the same things you do? Because we don't want the same things you want? I am sorry if our life style offends you. But maybe yours offends me. But it is not my place to tell you how to live it.

Tuesday, June 22, 2010

Quick Tip Tuesday: Chicken for salad

When ever I grill or pan cook whole chicken breasts, I always try to make at least one extra while I am at it. Then I cut it up into chunks or strips and freeze it in snack sized zip top baggies (usually half a chicken breast per baggie.) Then when I want chicken on a salad for lunch or a quick dinner, all I need do is pull out the chicken, rewarm it and I have a yummy topping for my salad. Super easy with out much extra effort!

Saturday, June 5, 2010

Shepherd's Pie


I have always been a fan of this lovely, simple, old-timey meal. Meat, potatoes, vegetables and cheese all in one pan. How can you beat that? Way back when, Mothers used to make this out of the bits of meat and veggies they had left over and covered it with the cold mashed potatoes from last night. Now, in better times, it is just a tasty comfort food that sticks to the ribs. Enjoy!


Ingredients:


1 pound ground beef or turkey


2 cups hot mashed potatoes


4 ounces cream cheese


1 cup shredded cheddar cheese


2 cloves garlic, minced


4 cups frozen mixed veggies, thawed


1 cup gravy


1. Preheat your oven to 370` F. Brown the meat in a large skillet. (While doing this, cook and mash your potatoes.) Drain.


2. Mix potatoes, cream cheese, 1/2 cup of the shredded cheese, and the garlic until well blended.


3. Stir vegetables and gravy into the meat.


4. Spoon the meat mixture into a 9x9 inch square baking dish.


5. Cover with the potato mixture. Don't worry about it being perfectly even; the more imperfect it looks, the better.


6. Sprinkle with remaining 1/2 cup shredded cheese. Bake for 20 minutes or until it is heated through.


Makes 4-6 servings.


Notes: I choose to scoop the meat out of the pan, leaving the drippings. Then I made a simple gravy (about 3 tbsp. flour, 1 cup of milk, and the fat drippings.) This worked out just perfect for me and saved me from either dirtying up another pan or buying super salty jarred gravy. Also, make sure your veggies are completely thawed! Mine were not and so I ended up having to bake it for another 10 minutes. This did not harm it in any way, it just took longer to bake than I expected. You can also use instant mashed potatoes for the topping and it works out well. Just omit the milk from the package directions, that way when you mix in the cream cheese they stay fluffy.


All in all, we really enjoyed this! Zach took leftovers to work the next day and lots of his co-workers said it smelled and looked yummy and one of them said he remembered his grandmother making it for him.

Saturday, May 15, 2010

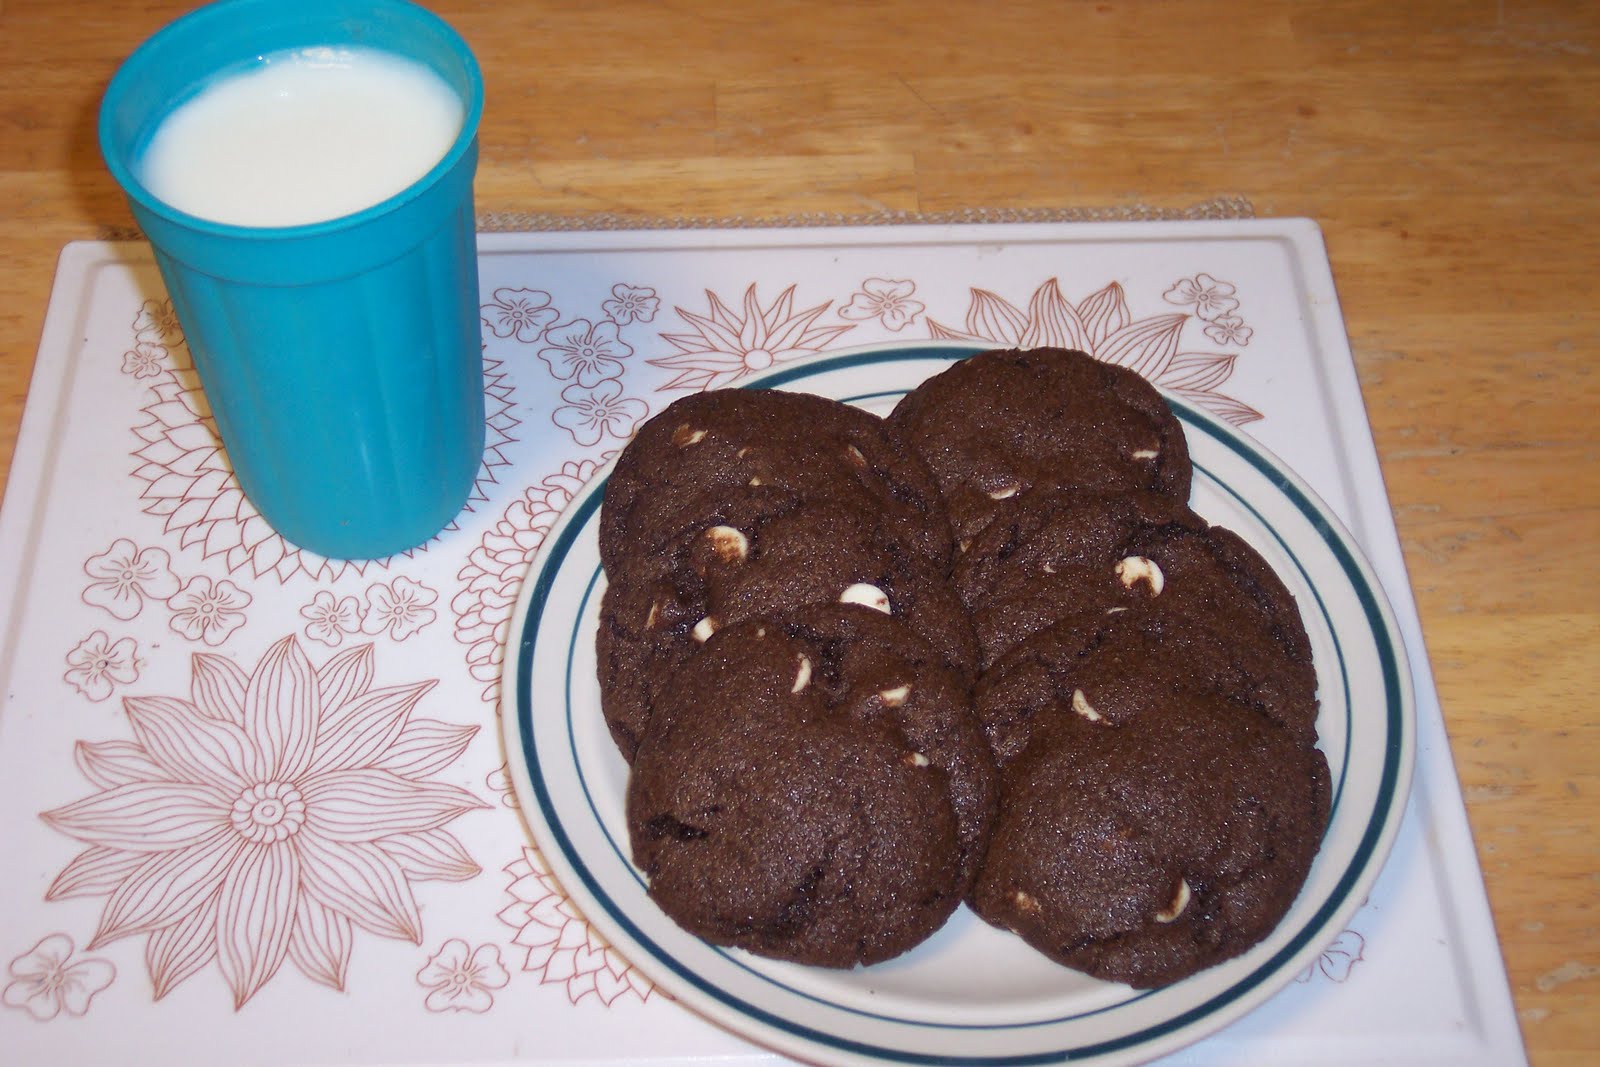
White chocolate chip cookies


These are just yummy! They are great warm, cold, with a glass of milk or broken up in a bowl of vanilla ice cream. A simple cookie with a great flavor! Chewy on the inside, crunchy on the outside. (This one's for you Christine! Hope you enjoy it!)

Ingredients


  • 1 cup butter, softened


  • 2 cups white sugar


  • 2 eggs


  • 2 tsp. vanilla extract


  • 2 cups all-purpose flour


  • 3/4 cup unsweetened cocoa (the powdered kind)


  • 1 tsp. baking soda


  • 1/2 tsp. salt


  • 1 2/3 cups white chocolate


Directions


  1. Preheat oven to 350 degrees F.


  2. In a large bowl, cream together the butter and sugar until smooth. Beat in the eggs one at a time, then stir in the vanilla.


  3. In a separate bowl, mix together flour, cocoa, baking soda and salt.


  4. Add dry mix into the wet mix a little at a time till all dry is used and the dough is well mixed. Fold in the white chocolate chips.


  5. Drop by rounded teaspoonfuls onto an ungreased cookie sheet, allowing for room to spread.


  6. Bake for 8 to 10 minutes in the preheated oven, until cookies are set. Allow cookies to cool on baking sheet for 5 minutes before removing to a wire rack to cool completely.


The dough from the cookies freezes really well! I have some thawing on the counter right now to enjoy with some yummy raw goats milk! Mmm.

Saturday, May 8, 2010

Scalloped Asparagus

I have never like asparagus! In fact, it has always been on my "foods I hate" list. But the only way I'd ever had it was boiled till mushy. That's just the way my family had always fixed it. So when I came down with a UTI when pregnant with "L" and the midwives told me to eat lots of asparagus (as it is great for urinary tract health,) I went out looking for a recipe that sounded even remotely edible. I was not holding out much hope! Then I came across this recipe and was pleasantly surprised to discover that asparagus can actually taste good! Since then I have made this and other dishes using this lovely green sprig and am glad to say that asparagus (as long as it is not boiled till mushy) is no longer on my "foods I hate" list!

Ingredients:
  • 3 cups fresh asparagus, trimmed (this is about one good sized bundle at the grocery store)
  • 1/4 cup flour
  • 1 cup milk
  • 1/4 cup butter, softened/room temperature
  • 1/2 cup grated cheese
  • 1 cup bread crumbs

Directions:

  1. Preheat the oven to 425 degrees F.
  2. Put all the asparagus (reserving a few tips for garnish) into a greased 8x8 casserole dish.
  3. In a separate bowl, combine flour, milk and butter then pour over the asparagus.
  4. Sprinkle with the cheese and then the bread crumbs. Dress with asparagus tips.
  5. Brown at 425'F for 20 minutes till asparagus is tender but not mushy.
  6. Enjoy!

Makes approximately 4-5 servings.

Friday, April 30, 2010

Frugal Tip Friday: Baked potato night


Looking for a frugal meal option? Once a week, institute a baked potato night! Potatoes are cheap! You can buy a 10 pound bag for under $4.00 and have about 25 to 30 medium sized potatoes. You can also buy larger "baking potatoes" as well, just stay away from the ones individually wrapped in plastic to the "baked" in the microwave as they are super pricey. They are really easy to make and can be topped with just about anything!


Preheat your oven to 350'F.


Scrub your potatoes well using a nail brush or veggie brush.


Jab a fork about 1/2 inch into each potato about 2 places on each side and once on each end of every potato.


Rub each potato down with oil (olive, veggie, canola, bacon grease, lard, ect.)


Place into a shallow baking dish or on a cookie sheet, not touching each other.


Bake at 350'F for 1 to 1 1/2 hours. They are done when the skin is slightly wrinkly and a fork goes in smoothly (should feel like when you boil potatoes for mashing.)


Serve with any of the following:


  • bacon bits (homemade or store bought)

  • shredded cheese

  • sour cream (or plain yogurt)

  • salt

  • butter

  • broccoli

  • chives

  • salsa
  • Be creative!

You can also pair the potato with a side salad, a bowl of soup, or a cup of fruit. Bake a few extra while you are at it. They warm up great in the microwave for a light lunch the next day at work! Try a baked sweet potato. I usually bake some of each as my hubby likes the sweet potato and I can give some to my little "L" as she is starting solids and really enjoys making a mess on her tray with chunks of sweet potato!

This is frugal as potatoes are filling, inexpensive and yet still very yummy. You can add what ever toppings taste good for each family member and they are usually things you have on hand.

Saturday, April 24, 2010

Monster Cookies (Rarrr!)


Monster cookies! Called that because they are BIG cookies if you follow the recipe. You can make them smaller, but why would you want to? These have become a favorite around here as they are quick and easy to make and are super yummy!


Ingredients:
  • 1 1/4 cups packed brown sugar
  • 1/2 cup shortening
  • 2 eggs
  • 2 1/2 cups baking mix (store bought or home made)
  • 1 cup oats (old-fashioned or quick cook)
  • 1 cup M&M's, chocolate chips, butter scotch chips, peanut butter chips, white chocolate chips or what ever you have on hands
  • 1/2 cup raisins (optional)
  • 1/2 cup chopped nuts (optional)

Directions:

  1. Preheat oven to 375'F. In a large bowl, beat brown sugar, shortening and eggs till smooth. Stir in remaining ingredients.
  2. On an ungreased cookie sheet, drop by 1/4 cupfuls about 2 inches apart. Flatten to about 1/2-inch thickness with the bottom of a glass that has been lightly sprayed with oil.
  3. Bake 12 to 16 minutes or until golden brown. Cool for about 3 minutes before trying to remove from the cookie sheet.

Makes about 1 1/2 dozen cookies.

This is what we chose to do with a few of our cookies. Yes, that's ice cream and it was GOOD! :o)


Saturday, April 10, 2010

Homemade Laundry Soap

Making your own laundry soap can be a great way to save your family money while still getting your clothes wonderfully clean. We have used homemade laundry soap (this recipe) for about 2 years now. It works great! Even on my husbands inky, stinky work clothes and on my daughters cloth diapers and clothes, with no allergic reaction. And she has sensitive skin! So here goes...

Ingredients:
2 cups bar soap (Ivory-what we use, Fels Naptha, or Zote. You can't use just any soap. It has to be one of these as they are low-foaming)
2 cups borax (found in the laundry section of your local big box store)
2 cups washing soda (do not confuse this with baking soda, they are not the same thing. You can find this in the laundry section of many grocery stores or on-line)
Step 1: Grate the soap. You can use a cheese grater or a knife and cutting board. Just make sure you shave it into very small pieces! This is the most difficult and longest process of the whole deal and it only takes about 10 minutes! :o) Place the soap shavings in a 1 gallon ice cream bucket. Mine happens to be 5 quart, doesn't really matter much. Place the bucket in your kitchen sink.

Step 2: On the stove, heat 1 quart of water to a rolling boil. Pour into the bucket with the soap shavings and stir with a whisk till all the soap is melted. If there are a few small pieces floating, it's alright, they will eventually dissolve.

Step 3: Add in the borax and washing soda. Again, stir with the whisk till they are totally dissolved. At this point, it will look like slightly thinned icing. Note the picture below of it dribbling off the whisk. Looks good enough to lick off the whisk, but by all means, restrain yourself from doing so! It will only bring back bad memories of the first time you back talked your Grandmother! :-P
Step 4: (And this is why we put it in the sink) add in cold water till your bucket is full. Stir lightly with your whisk. You will get some bubbles but try to keep them to a minimum.

Mmm. Frothy goodness.


Step 5: Put on the lid and allow to sit for at least 24 hours. After that 24 hours, stir well again with the whisk. Make sure you label well!


Step 6: Mark on the back of the bucket three lines of equal portions. I did this with a ruler.
To use: Stir well and dip out 1/3 of the mix. Pour into a 1 gallon container. You can use another ice cream bucket, a glass pickle jar or an old laundry soap container (this is that I use.) Add in another gallon or so of water, what ever it takes to fill up the container. Every time you use it, give it a little shake or stir.
Use 1/4 cup per regular load. For high efficiency washers you can use even less.
Like I stated before, this works great! And it is cheap too! Less than $2.00 for the pre-mix which makes three containers full once diluted. I would guess that at about 100 loads or so. You can also add some drops of essential oils.
Tea tree- natural antiseptic
Lavender- for smell
Or any other scents you like.
Enjoy!

Saturday, March 13, 2010

Homemade Baking Mix

Mmmm, fresh biscuits. Strawberry short cake. Impossible pie.

When working with a good baking mix, the possibilities are just about endless.

This is a recipe for your favorite baking mix. Sorry, but I am going to have to drop a brand name here. Bisquick. Shh! Don't tell anyone but you can make this at home, from scratch, for WAY less than you pay for it in the store! Ok, you can tell someone if you'd like!

Ingredients:
5 cups white flour
4 cups wheat flour (I would guess you could substitute with white)
1 1/2 Tbsp. salt (I usually only use maybe half this)
4 Tbsp. baking powder
2 c. vegetable shortening (I have used coconut oil for a healthier option and it works just fine. I would think you could also use lard but it would have to be refrigerated.)

Get out a BIG bowl. I have also used a dish pan. Mix together the flours, salt and baking powder. Add in the shortening and use your hands to break it up into the flour till it is light and crumbly.


Do not over mix. The shortening lumps should be about the size of peas. Place in a good sealing container and store in the cabinet.


Use where ever biscuit mix or Bisquick is called for.

A simple and yet yummy recipe using your baking mix...

Drop Biscuits

2 1/4 c. baking mix
2/3 c. milk.

Mix together in a medium bowl till mostly smooth. Drop by spoon fulls onto an ungreased cookie sheet. Bake at 450 degrees for 8 to 10 minutes, until lightly browned. Makes approx. 10 biscuits.

Saturday, February 20, 2010

Granola: Not just for hippies anymore!

Ingredients

This isn't so much a recipe as a guide to making granola. Granola is super expensive to buy in the store! And even though it is supposed to be "healthy" it is often packed with fillers and who knows what else. It is actually quite easy to whip up a batch!
Ingredient Options
  • 2 cups Oats (the quick kind, not the old fashioned)
  • 2 cups Rice cereal (like the kind to make rice crispy's)
  • 1/2 cup peanuts (or any other kind of nuts)
  • 1/2 cup chocolate chips (semi-sweet, milk, butter scotch, white, any will do) You can also use M&M's
  • 1/2 cup dried fruit
  • 1 cup shredded, sweetened coconut
  • 1/4 cup maple syrup or honey
  • 1/4 cup peanut butter
  • 1/2 cup raisins
  • Anything else you can come up with

All but the top two are optional. It's your choice! Mix all of your choice of ingredients together (holding back the chocolate chips, raisins and dried fruit till after cooking). Once mixed well, pour it out onto a cookie sheet. You may need two, just make sure it is no thicker than 1/2 inch.

Granola before toasting.

Place the granola in an oven heated to 250 degrees. Toast it for 15 minutes, stir, toast again for 15 minutes, stir, toast, stir... Well, you get the point. Do this pattern till you have toasted the mix for 45 minutes to an hour. 45 minutes usually does it for me. Allow to completely cool before mixing in the dried fruit, chocolate, and/or raisins. Store in a sealed container. I keep mine in an old oats container.


The finished product!
Serve on yogurt, as cereal with milk, or just as is. It will keep on the counter for 2 to 4 weeks, but ours never seems to stay around that long. :o)


Saturday, February 13, 2010

Pumpkin Bread

Ok, can I just say "Yum!" I think I could eat this picture!


Honest, it tastes even better than it looks!

I figured since I taught you how to cook and clean a pumpkin, I should give you something to do with it. And if you don't feel like making the pumpkin yourself, feel free to buy a can! I'll never know! :o)

This is a super easy bread recipe. It reminds me of a zucchini or banana nut bread in that is it really moist and, like the zucchini bread, has a good spice to it.

Ingredients:
2 cups fresh or canned pumpkin (this is one regular sized can)
1/2 cup vegetable oil (or canola, that's what I use)
1 egg
2 cups sugar
3/4 tsp. cinnamon (more if you like)
1/2 tsp. pumpkin spice (more if you like)
3/4 tsp. salt
2 tsp. baking soda
2 1/2 cups flour (white, wheat or half and half)
1/2 cup chopped nuts (optional)
1/2 cup raisins (optional)

Instructions:

1: Preheat oven to 350' on bake. Grease a bunt pan, one regular sized bread pan, or two mini bread pans. I would think you could do this in a muffin tin but I have never tried it to know how many it would make or how long to bake it. I would guess at least a dozen and probably 30 minutes.

2: Mix all but the last three ingredients together till smooth. Then add in the last three and mix till smooth again.

3: Pour into the pan/pans and spread evenly. For the bunt or regular sized bread pan-bake at 350' for 1 hour and 30 minutes. For the mini loafs- bake at 350' for 45 minutes to 1 hour.


You can't see it in the picture, but it was still steaming. :o) I am impatient!


4:Remove from oven and allow to cool for 10 minutes in the pan. Turn out onto a cutting board and force yourself to give it at least a few more minutes before cutting into and taking a big bite.
This is really good with a little butter on it! Have it for dessert, for breakfast along side bacon and eggs, or for an afternoon snack. It is yummy no matter when you try it! It's spicy, moist and you can still see little orange bits of pumpkin! Mmmm. I think I will go have me another piece now!

Wednesday, February 10, 2010

Peter Peter Pumpkin Cooker

This past October I got 4 beautiful pie pumpkins from my Mom. I had never in my life cooked a pumpkin but I was determined to at least give it a go. As always, I turned to my trusty Google search bar and began looking. I found out it is actually rather easy and even fun. The pumpkins store well, so if you find them on sale, grab up a few! I got mine in October and I cooked up the last one in early February and it still had lots of life in it! Store in a cool, dry place. Mine were on the floor in a corner in the kitchen for most of that time.

Now how to cook the lovely!


Step One: Pick a Pumpkin and prepare the oven

My pumpkin of choice!

You want one that is as bug bite and blemish free as possible, but don't get carried away. It doesn't have to be perfect. Wash outside of chosen pumpkin, removing all the dirt and grime. No soap, just cool or warm water. As for the oven, you are going to need to remove all but one rack and set it to the lowest setting. Then preheat the oven to 350' on bake.


Step Two: Cut open and clean the pumpkin
A big spoon, a good cutting board and a sharp knife (I used my butcher knife) are all the tools you need for this part. Cut around the pumpkin, being careful not to hack into your thumb. When you have the pumpkin in two halves, scoop out the seeds and most of the "stringy" stuff with your spoon like you would when carving a jack-o-lantern. Then cut a hole in the top around the stem, nothing too big, maybe two inches across. Then do the same to the bottom. These will be the vent holes when cooking.

Step Three: Place in pan and cook

The cooked pumpkin after placing it on a wire rack.

I used two 8 inch round cake pans but any pan that has about 2 inch sides will do. A couple 9X9 inch square pans, a couple 9X13 inch pans, some deep dish pie plates, what ever you have on hand! Spray the bottom your chosen pan and all cut edges of the pumpkin with cooking spray. Place pumpkin *cut side down* in the pan. Then you are going to add water about 1 inch deep around and in the pumpkin. I find the easiest way to do this without spilling water everywhere (trust me on this one!) is to fill a large measuring cup with water, open the oven door, place the pans with the pumpkin in it on the rack, then pour the water in the hole in the top and around the outside. Go slow! Once you have about an inch of water, push the rack in, close the door and bake! Bake at 350' for 45 minutes to an hour. When you can poke into the skin with a fork with little effort, the pumpkin is done. I have found that older pumpkins take a little longer.

Step Four: Cool and scoop


Beginning to scoop the flesh out.


The rind/skin after all the flesh is removed.

Remove the pumpkin from the oven carefully and pour some of the water out, preferably in the sink, not on your kitchen floor and feet. Turn the pumpkin halves over onto a wire rack over a cookie sheet, if you have them (if not, just turn them over and leave then in the pan). Cool them till you can comfortably touch the pumpkin without burning yourself. You can let the cool completely if you like, I am just not that patient! Using your trusty big spoon from before, scoop out the "flesh" of the pumpkin, being careful not to get any of the rind/skin. Scoop it out into a big bowl until you have all that orangy goodness.


Step Five: Do the mash!
Ok, so you aren't going to do the Monster Mash (unless you want to, then by all means go ahead)! You are, however, going to mash/puree the pumpkin. There are three basic ways in which to do this. One: scoop amounts into a food processor and whirl till thoroughly pureed. Dump out and repeat till done. Way too much clean up for me! I hardly ever use the food processor! Two: use an old fashioned potato masher or fork or pastry cutter to thoroughly puree it all. This works fine, but I prefer the last method. Three: use your hands! :o) Oh yeah! Nothing better than mashing warm, mushy, slimy pumpkin between your fingers. Ok, so maybe not for everyone but come on! What adult didn't want to do this as a child? In fact, this would be a great time to bring the kiddos into the room to help. Give them a small bowl of it and let them go.


Step Six: Finish up


The mashed pumpkin and the filter lined colander.

Line a large colander with a few layers of cheese cloth, a tea towel or coffee filters. The filters is my method of choice and it has worked great! Dump the mashed pumpkin into the colander and set said colander over the bowl that the mashed pumpkin was just in. Place the two bowls in the fridge over night or for about 8 hours. You can do longer if you need to! This allows extra moisture out of the puree. After the 8 hours, you can use the pumpkin to make pies, breads, cookies, anything recipe that calls for canned pumpkin. I put mine in zip lock baggies in 1 and 2 cup amounts and freeze it (with the baggies laying down so they are flat and store in the deep freezer easier). Label it well, though with the *bright* orange color, how could you not know what it is?
So why cook your own pumpkin when you can just go to the store and buy a can?
~It is cheaper! I can get about 8 cups of pumpkin (that is 4 cans) from one good old gourd.
~It makes your house smell wonderful!
~It's fun!
I will be sure to post some good pumpkin recipes in the future!