Showing posts with label Super Recipe Saturday. Show all posts

Saturday, August 7, 2010

Tomato, basil, mozerrlla pasta


Another wonderful, simple, whole foods meal recipe!


Who ever first decided to mix these things together should win an award!


Ingredients:

1 large tomato per person

1 cup dry pasta per person (what ever type you like)

diced block mozzarella cheese, to your liking (you can also use fresh cheese or shredded cheese)

dried or fresh basil, again to your liking (oregano is also good)


Put the pasta on to boil in a medium sized sauce pan. While this is cooking, dice your tomatoes and cheese and (if using fresh) mince up the herbs. When the pasta is al dente, pour into a colander. While the pasta is draining well, place the tomatoes and herbs in the pan. Cook on medium till heated through, falling apart, and fragrant. Add in the cheese and the pasta. Cook till the cheese is starting to melt. Dish into a bowl and enjoy! This also makes a nice cold salad.

Tuesday, July 27, 2010

Roasted chicken and veggies


Lunch today was baked/roasted chicken, potatoes, carrots and onions. It is a simple, easy, yummy meal so I figured I'd share! I would live to do more recipes like this where I walk you through step by step on how to make a simple meal. Just to show that you can make a good, healthy whole foods meal without too much effort. In total the prep time is probably 30 minutes! Then you can just sit back and relax while it is cooking, all in one pan!

I washed the potatoes and peeled the carrots and then cut them into a little bigger than bite sized pieces. I did the same with the onion. Place all those in a 9X13 inch pan, drizzle with olive oil. I then sprinkled on dried oregano and rosemary and powdered garlic. But please feel free to use what ever tastes good to you! Put that in the oven to bake while you get the chicken ready.

Skin a whole chicken. You can leave the skin in if you like, I just don't like. :o) Then cut it up into 8 pieces (2 legs, 2 thighs, 2 wings, 2 breasts). By the time this is done, the veggies will have begun to cook nicely. (You could skip the step and use a pre-cut up chicken or your favorite chicken parts- chicken breasts, legs and thighs, etc.)

Pull the pan out of the oven and stir the veggies. Place the chicken on top of the veggies and sprinkle with the herbs and seasonings. Place back in the oven to cook till done. Should take between 30-45 minutes. Till the chicken temps between 165-180.

Mean while, place the chicken carcass in a large pot and cover with water. Put a lid on it and place on the stove. Add seasonings if you wish but it is not necessary. Allow to simmer on the stove for 2-how ever many hours! :o) When done, pull the chicken from the water and allow to cool on a plate for a bit then using your hands, pick off any bits of meat you can find. Add to the chicken broth and place in quart sized zip top baggies (I usually do about 2 cups per bag). Lay them down on a cookie sheet and place in the freezer over night to get solid.

Now you have a nice meal and chicken broth for later use!

Saturday, June 5, 2010

Shepherd's Pie


I have always been a fan of this lovely, simple, old-timey meal. Meat, potatoes, vegetables and cheese all in one pan. How can you beat that? Way back when, Mothers used to make this out of the bits of meat and veggies they had left over and covered it with the cold mashed potatoes from last night. Now, in better times, it is just a tasty comfort food that sticks to the ribs. Enjoy!


Ingredients:


1 pound ground beef or turkey


2 cups hot mashed potatoes


4 ounces cream cheese


1 cup shredded cheddar cheese


2 cloves garlic, minced


4 cups frozen mixed veggies, thawed


1 cup gravy


1. Preheat your oven to 370` F. Brown the meat in a large skillet. (While doing this, cook and mash your potatoes.) Drain.


2. Mix potatoes, cream cheese, 1/2 cup of the shredded cheese, and the garlic until well blended.


3. Stir vegetables and gravy into the meat.


4. Spoon the meat mixture into a 9x9 inch square baking dish.


5. Cover with the potato mixture. Don't worry about it being perfectly even; the more imperfect it looks, the better.


6. Sprinkle with remaining 1/2 cup shredded cheese. Bake for 20 minutes or until it is heated through.


Makes 4-6 servings.


Notes: I choose to scoop the meat out of the pan, leaving the drippings. Then I made a simple gravy (about 3 tbsp. flour, 1 cup of milk, and the fat drippings.) This worked out just perfect for me and saved me from either dirtying up another pan or buying super salty jarred gravy. Also, make sure your veggies are completely thawed! Mine were not and so I ended up having to bake it for another 10 minutes. This did not harm it in any way, it just took longer to bake than I expected. You can also use instant mashed potatoes for the topping and it works out well. Just omit the milk from the package directions, that way when you mix in the cream cheese they stay fluffy.


All in all, we really enjoyed this! Zach took leftovers to work the next day and lots of his co-workers said it smelled and looked yummy and one of them said he remembered his grandmother making it for him.

Saturday, May 15, 2010

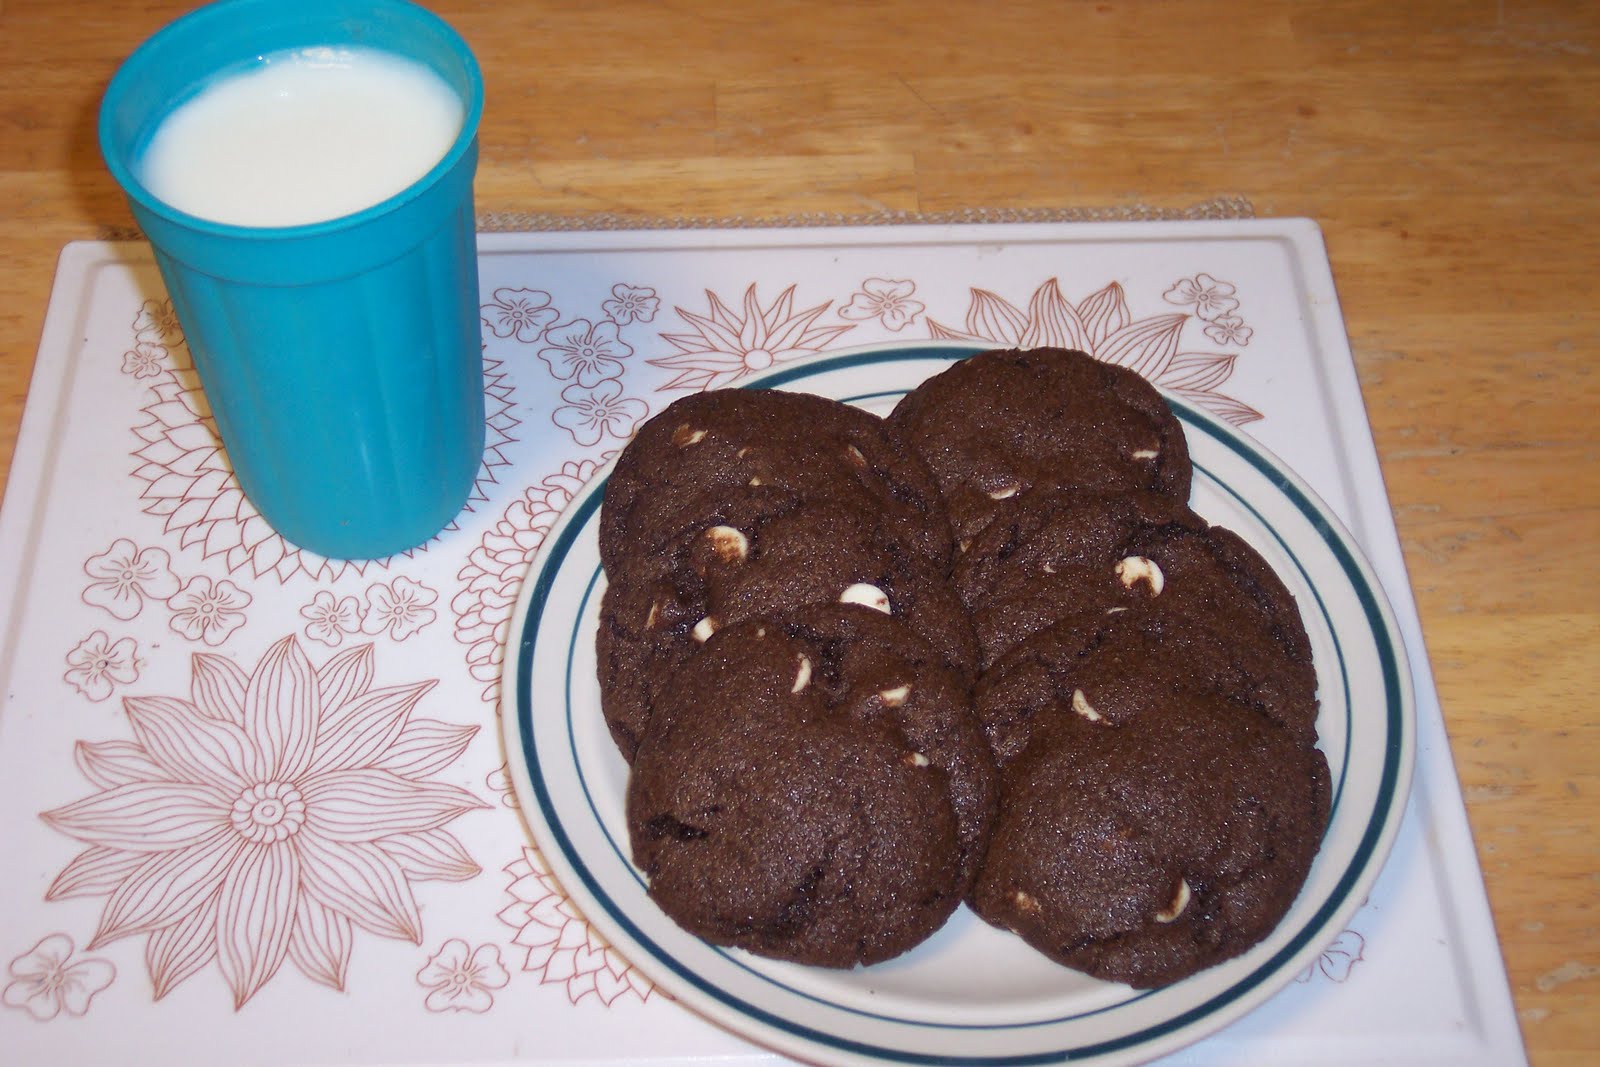
White chocolate chip cookies


These are just yummy! They are great warm, cold, with a glass of milk or broken up in a bowl of vanilla ice cream. A simple cookie with a great flavor! Chewy on the inside, crunchy on the outside. (This one's for you Christine! Hope you enjoy it!)

Ingredients


  • 1 cup butter, softened


  • 2 cups white sugar


  • 2 eggs


  • 2 tsp. vanilla extract


  • 2 cups all-purpose flour


  • 3/4 cup unsweetened cocoa (the powdered kind)


  • 1 tsp. baking soda


  • 1/2 tsp. salt


  • 1 2/3 cups white chocolate


Directions


  1. Preheat oven to 350 degrees F.


  2. In a large bowl, cream together the butter and sugar until smooth. Beat in the eggs one at a time, then stir in the vanilla.


  3. In a separate bowl, mix together flour, cocoa, baking soda and salt.


  4. Add dry mix into the wet mix a little at a time till all dry is used and the dough is well mixed. Fold in the white chocolate chips.


  5. Drop by rounded teaspoonfuls onto an ungreased cookie sheet, allowing for room to spread.


  6. Bake for 8 to 10 minutes in the preheated oven, until cookies are set. Allow cookies to cool on baking sheet for 5 minutes before removing to a wire rack to cool completely.


The dough from the cookies freezes really well! I have some thawing on the counter right now to enjoy with some yummy raw goats milk! Mmm.

Saturday, May 8, 2010

Scalloped Asparagus

I have never like asparagus! In fact, it has always been on my "foods I hate" list. But the only way I'd ever had it was boiled till mushy. That's just the way my family had always fixed it. So when I came down with a UTI when pregnant with "L" and the midwives told me to eat lots of asparagus (as it is great for urinary tract health,) I went out looking for a recipe that sounded even remotely edible. I was not holding out much hope! Then I came across this recipe and was pleasantly surprised to discover that asparagus can actually taste good! Since then I have made this and other dishes using this lovely green sprig and am glad to say that asparagus (as long as it is not boiled till mushy) is no longer on my "foods I hate" list!

Ingredients:
  • 3 cups fresh asparagus, trimmed (this is about one good sized bundle at the grocery store)
  • 1/4 cup flour
  • 1 cup milk
  • 1/4 cup butter, softened/room temperature
  • 1/2 cup grated cheese
  • 1 cup bread crumbs

Directions:

  1. Preheat the oven to 425 degrees F.
  2. Put all the asparagus (reserving a few tips for garnish) into a greased 8x8 casserole dish.
  3. In a separate bowl, combine flour, milk and butter then pour over the asparagus.
  4. Sprinkle with the cheese and then the bread crumbs. Dress with asparagus tips.
  5. Brown at 425'F for 20 minutes till asparagus is tender but not mushy.
  6. Enjoy!

Makes approximately 4-5 servings.

Saturday, May 1, 2010

Sausage Chili Bake

This was on last weeks menu to try and I said if it was good, I'd post the recipe. So, it was evidently good! :o)

Ingredients:
  • 1 pound smoked sausage, cut into 1/4 inch slices
  • 1 small onion, chopped (about 1/4 cup)
  • 1 tsp. garlic powder (or garlic salt, we just watch our salt intake)
  • 1 to 2 tablespoons chili powder
  • 1 can (14.5 oz.) stewed tomatoes, undrained
  • 1 can (15 to 16 oz.) kidney beans, undrained
  • 2 cups biscuit mix (store bought or homemade)
  • 1/2 cup cornmeal
  • 1 cup milk
  • 2 eggs

Directions:

  1. Heat oven to 350'F. Spray a 10-inch skillet with cooking spray and heat over medium-high heat. Cook sausage and onion in skillet for 4 to 5 minutes, stirring occasionally, until onion is tender. Spoon into ungreased 9x9 or 8x8 inch baking dish. Stir in garlic salt, chili powder, tomatoes and beans.
  2. In a medium bowl, stir together the remaining ingredients until blended. Pour over sausage mixture.
  3. Bake uncovered 35 to 40 minutes or until crust is light golden brown.

Notes: There was quite a bit of liquid when it was finish cooking, though later the leftovers were less moist as some of the liquid was absorbed into the mixture. Next time I might drain a little of the juice off the tomatoes or beans. Also, the "pour over sausage mixture" is a joke. It is way to thick to pour! Instead, you have to spoon it on in lumps all over the top and then kind of spread it out. It will pretty well even out when it is baked. I also cut the sausage into smaller pieces. I cut it in half length wise and then sliced it into 1/4 inch thick pieces. I also used a little less than a pound and we didn't miss it. Between the beans and the sausage, I figured it was plenty of protein!

Makes 6-8 servings. Serve with green beans, a side salad or just by itself. Either way, it was quite tasty!


Saturday, April 24, 2010

Monster Cookies (Rarrr!)


Monster cookies! Called that because they are BIG cookies if you follow the recipe. You can make them smaller, but why would you want to? These have become a favorite around here as they are quick and easy to make and are super yummy!


Ingredients:
  • 1 1/4 cups packed brown sugar
  • 1/2 cup shortening
  • 2 eggs
  • 2 1/2 cups baking mix (store bought or home made)
  • 1 cup oats (old-fashioned or quick cook)
  • 1 cup M&M's, chocolate chips, butter scotch chips, peanut butter chips, white chocolate chips or what ever you have on hands
  • 1/2 cup raisins (optional)
  • 1/2 cup chopped nuts (optional)

Directions:

  1. Preheat oven to 375'F. In a large bowl, beat brown sugar, shortening and eggs till smooth. Stir in remaining ingredients.
  2. On an ungreased cookie sheet, drop by 1/4 cupfuls about 2 inches apart. Flatten to about 1/2-inch thickness with the bottom of a glass that has been lightly sprayed with oil.
  3. Bake 12 to 16 minutes or until golden brown. Cool for about 3 minutes before trying to remove from the cookie sheet.

Makes about 1 1/2 dozen cookies.

This is what we chose to do with a few of our cookies. Yes, that's ice cream and it was GOOD! :o)


Saturday, April 17, 2010

Lovely Lemonade


Who doesn't love a cool glass of lemonade on a warm day? It is sweet, refreshing and ohh so yummy! So I thought I'd share my favorite (and easy) recipe.

Ingredients:
1 1/4 cups lemon juice (fresh squeezed or from a bottle, 100% juice of course)
1 1/4 cups sugar or honey
1 gallon cold water
Lemon slices (seeded) for garnish, optional (though it does make a pretty garnish when you have company)

Directions:
Pour the first two ingredients into a 1 gallon pitcher and stir till the sugar/honey is mostly dissolved. Add in the cold water till full. Either place the lemon slices floating on top in the pitcher or on the rim of each glass. Serve over ice or straight up.

Saturday, April 10, 2010

Homemade Laundry Soap

Making your own laundry soap can be a great way to save your family money while still getting your clothes wonderfully clean. We have used homemade laundry soap (this recipe) for about 2 years now. It works great! Even on my husbands inky, stinky work clothes and on my daughters cloth diapers and clothes, with no allergic reaction. And she has sensitive skin! So here goes...

Ingredients:
2 cups bar soap (Ivory-what we use, Fels Naptha, or Zote. You can't use just any soap. It has to be one of these as they are low-foaming)
2 cups borax (found in the laundry section of your local big box store)
2 cups washing soda (do not confuse this with baking soda, they are not the same thing. You can find this in the laundry section of many grocery stores or on-line)
Step 1: Grate the soap. You can use a cheese grater or a knife and cutting board. Just make sure you shave it into very small pieces! This is the most difficult and longest process of the whole deal and it only takes about 10 minutes! :o) Place the soap shavings in a 1 gallon ice cream bucket. Mine happens to be 5 quart, doesn't really matter much. Place the bucket in your kitchen sink.

Step 2: On the stove, heat 1 quart of water to a rolling boil. Pour into the bucket with the soap shavings and stir with a whisk till all the soap is melted. If there are a few small pieces floating, it's alright, they will eventually dissolve.

Step 3: Add in the borax and washing soda. Again, stir with the whisk till they are totally dissolved. At this point, it will look like slightly thinned icing. Note the picture below of it dribbling off the whisk. Looks good enough to lick off the whisk, but by all means, restrain yourself from doing so! It will only bring back bad memories of the first time you back talked your Grandmother! :-P
Step 4: (And this is why we put it in the sink) add in cold water till your bucket is full. Stir lightly with your whisk. You will get some bubbles but try to keep them to a minimum.

Mmm. Frothy goodness.


Step 5: Put on the lid and allow to sit for at least 24 hours. After that 24 hours, stir well again with the whisk. Make sure you label well!


Step 6: Mark on the back of the bucket three lines of equal portions. I did this with a ruler.
To use: Stir well and dip out 1/3 of the mix. Pour into a 1 gallon container. You can use another ice cream bucket, a glass pickle jar or an old laundry soap container (this is that I use.) Add in another gallon or so of water, what ever it takes to fill up the container. Every time you use it, give it a little shake or stir.
Use 1/4 cup per regular load. For high efficiency washers you can use even less.
Like I stated before, this works great! And it is cheap too! Less than $2.00 for the pre-mix which makes three containers full once diluted. I would guess that at about 100 loads or so. You can also add some drops of essential oils.
Tea tree- natural antiseptic
Lavender- for smell
Or any other scents you like.
Enjoy!

Saturday, April 3, 2010

Morning Glory Muffins


These turned out so good, I just had to share! They are packed with fruits, nuts, spices, and even a veggie. It's like an entire meal in a muffin. :o) Ok, so maybe you will have to eat something else with it but they are really good!
Ingredients:
6 eggs
2 1/2 c. sugar
2 c. oil
4 c. grated carrots
1 c. coconut
1 c. raisins
1 c. chopped nuts
2 c. grated apples
4 tsp. baking soda
1 tsp. salt
4 tsp. cinnamon
4 c. flour
Directions:
Stir all ingredients together. Make as many muffins as desired, baking at 375 degrees for 20 minutes.
Note: This recipe makes quite a lot of batter. Extra batter will keep in the refrigerator for up to 4 weeks!
Yields: 4 dozen muffins.
I made a half a batch and baked them all in two mornings. The first day will take a while in prep to get all the ingredients shredded, chopped, together, and mixed, so allow yourself a good hour or so from start to finish. But then the next day(s) are super easy! Just pour however many muffins you want and bake! Or do like I did and bake them all in just a couple/few days.
These also freeze well! Bake them up, allow them to cool and then store in a freezer bag in the freezer. When ever you want them for breakfast or a snack, pull out the number you need and pop in the microwave for about a minute or in the toaster oven for a couple minutes.
Serve with butter or just dry and enjoy!

Saturday, March 27, 2010

Italian Bake

This is a quick, simple and very good dish that could prove to be a favorite around the Lance house.

Ingredients:
  • 1 pound ground beef or turkey
  • 1 1/4 cups tomato pasta sauce
  • 1 cup frozen corn
  • 1 cup shredded mozzarella cheese
  • 2 cups homemade biscuit mix or Bisquick mix
  • 3/4 cup milk
  • 1/4 cup grated Parmesan cheese

Heat oven to 400'F. Spray one 8-inch square (2-quart) glass baking dish with cooking spray.

In a skillet, brown beef/turkey until brown; drain. Stir in 1 1/4 cups pasta sauce and the corn and heat to boiling; spoon into baking dish. Top with the mozzarella cheese. (In the picture I accidental forgot to put on the cheese and ended up putting it on the biscuit topping. It still turned out good. Do it how ever you like!)

Meanwhile, in a medium bowl, stir biscuit mix, milk, and Parmesan cheese until a soft dough forms. Drop dough by 12 to 16 spoonfuls onto the meat mixture.

Bake uncovered for 20 to 25 minutes or until topping is golden brown and a toothpick inserted in the topping comes out clean. Serve topped with additional warmed pasta sauce if desired. (We didn't as it seemed fine without it.)

This makes approximately 6 servings. Pair with a salad, green beans and warm applesauce and you've got a tasty meal for a work night!


Mmm. Yum!


Saturday, March 20, 2010

Homemade Applesauce

Peach and pear applesauce cooling on the stove.

I fondly remember eating warm, homemade applesauce growing up. My Grandma was the best at it. She'd put a bowl of still steaming hot apples on the table and I just couldn't wait to dig into them. They were chunky yet smooth. Warm yet just as good cold. And always so sweet and delicious.

Ingredients:
1- 3 pound bag of your favorite apples (any red variety works well, green tend to be too tart), peeled, cored and sliced thin or cubed into 1/2 inch pieces

Optional ingredients:
1 large can sliced peaches in light syrup
1 large can sliced pears in light syrup
cinnamon

Pour the peeled, cored and cubed/sliced apples into a big pot. Add in 1 can of sliced peaches (including juice) and 1 can of sliced pears (drain this one). This is optional but it does add a nice flavor and texture. If you choose not to add the canned fruit, add in 1/4 cup water to the apples.
Cover and simmer on medium low for about 1 hour, stirring occasionally. The apples should be mushy and tender. If you stir it briskly with a spoon, they should start to break up.
When they have reached the desired consistency, mash then up with a potato masher, fork, spoon, or hand mixer (I prefer the potato masher) until they are (again) to your desired consistency. We like ours a little chunky still but you can get them as chunky or smooth as you like.
Dip up into containers and chill, eat warm, or freeze. This does freeze really well. This recipe makes about 4 of the containers seen in the picture above.
Get creative with the ingredients! Strawberries, pineapple, honey. I would love to come up with a cherry version but haven't yet figured that out.
I do have to be honest, I have done the math on this recipe and it is actually cheaper to buy jarred applesauce at the store. But it tastes so much better home made! :o)

Saturday, March 13, 2010

Homemade Baking Mix

Mmmm, fresh biscuits. Strawberry short cake. Impossible pie.

When working with a good baking mix, the possibilities are just about endless.

This is a recipe for your favorite baking mix. Sorry, but I am going to have to drop a brand name here. Bisquick. Shh! Don't tell anyone but you can make this at home, from scratch, for WAY less than you pay for it in the store! Ok, you can tell someone if you'd like!

Ingredients:
5 cups white flour
4 cups wheat flour (I would guess you could substitute with white)
1 1/2 Tbsp. salt (I usually only use maybe half this)
4 Tbsp. baking powder
2 c. vegetable shortening (I have used coconut oil for a healthier option and it works just fine. I would think you could also use lard but it would have to be refrigerated.)

Get out a BIG bowl. I have also used a dish pan. Mix together the flours, salt and baking powder. Add in the shortening and use your hands to break it up into the flour till it is light and crumbly.


Do not over mix. The shortening lumps should be about the size of peas. Place in a good sealing container and store in the cabinet.


Use where ever biscuit mix or Bisquick is called for.

A simple and yet yummy recipe using your baking mix...

Drop Biscuits

2 1/4 c. baking mix
2/3 c. milk.

Mix together in a medium bowl till mostly smooth. Drop by spoon fulls onto an ungreased cookie sheet. Bake at 450 degrees for 8 to 10 minutes, until lightly browned. Makes approx. 10 biscuits.

Saturday, March 6, 2010

Crockpot BBQ and Cornbread Casserole


For those of you who know me personally, you know how much I love my crock pots! They make for such easy meals! I use mine mostly for days when my DH is off work. I can make us a big breakfast and then while cleaning up from it, I can start dinner. Then, come 6:00 that evening, dinner is hot, done, and yummy with little to know work! How much better does it get?
Anyway, here is a wonderful recipe I found at this ladies site and I just had to try it! I hope you might enjoy it as well!
Ingredients:
  • 1 pound of chicken, cubed a cooked through or mostly through (about 2 large chicken breasts do it.)
  • 1 sweet potato, peeled and cubed into 1 inch chunks (optional)
  • one small onion, diced
  • 1 cup frozen or fresh corn
  • 1 bottle of your favorite BBQ sauce (18 oz)
  • 1/4 cup warm water

Corn bread topping:

  • 3/4 cup corn meal
  • 1 1/4 cup flour
  • 1 cup milk
  • 1/4 cup sugar
  • 1 egg
  • 1 tsp baking powder

Directions:

I used a 4 quart crock pot for this and it was a great size! I know the sweet potatoes say "optional," but seriously, use them! In fact, I doubled it and used two. I don't normally like sweet potatoes but in this, they are great! They add a wonderful texture and flavor. Also, the first time I made this, I used the full recipe for the corn bread topping and it was just a little too much for our liking. I have since cut the recipe in half any time I've made it and it is about right. But, by all means, if your family likes cornbread, use it all!

Place the chicken, potatoes, onion, and corn in the crock pot. Squeeze in the entire bottle of BBQ sauce. Then pout the 1/4 cup of water into the bottle, close the top, shake and then pour into the crock pot. Mix it all together well with a spoon.

In a separate bowl, mix together all the corn bread topping ingredients. Spread on top of the chicken mix.

Cover and cook on low for 6 to 8 hours. Makes about 4 to 6 decent sized portions.

The corn bread actually bakes in the crock pot and soaks up some of the good juices from the chicken mix. Serve with a side salad and some fruit and you have a wonderful meal!

Looking at the picture, I just wanna go whip up another batch! :o)

Saturday, February 27, 2010

Chocolate Oatmeal Cake


Mmm. Chocolate cake! I have never been a big fan of chocolate cake. Then I found this recipe! Not too chocolaty. Moist. Chewy. And oooh so good!

Ingredients
  • 2 cups boiling water
  • 1 1/2 cups quick oatmeal
  • 3/4 cup melted margarine or butter, melted
  • 2 cups sugar
  • 3 eggs
  • 2 tsp. vanilla
  • 3/4 tsp. salt
  • 2/3 cup baking cocoa (the powdered kind)
  • 1 1/2 tsp. baking soda
  • 1 1/2 cups flour

Preheat oven to 350 degrees.

Get out your trusty mixing bowl and spatula.

Mix oatmeal and boiling water together the large mixing bowl. While that is sitting, grease one 9X13 inch pan or two 8 inch round pans. Add in the margarine and stir, making sure it is completely melted. At this point, it will look like runny oatmeal.

Add in the sugar and mix well. Then add in the eggs and beat till smooth and glossy. Add vanilla, salt, cocoa, and baking soda. Mix well. Add in the flour and mix well again.

Pour into your greased pan(s) and bake at 350 degrees for 35 minutes. Or till a toothpick inserted in the middle comes out clean.


See that little crumb on the plate to the left of the cake. Yeah, I ate that right after taking this picture! :o)

Allow to cool for 10 to 15 minutes before cutting, if you can wait that long. I have never used icing on it but I am sure it would be yummy with some. But it really doesn't need it!

This cake freezes really well!! I usually freeze all but a couple pieces to eat later. All you have to do is get out a piece, warm in the microwave for a minute or so and top with vanilla ice cream! A quick and easy dessert any day of the week.

Saturday, February 20, 2010

Granola: Not just for hippies anymore!

Ingredients

This isn't so much a recipe as a guide to making granola. Granola is super expensive to buy in the store! And even though it is supposed to be "healthy" it is often packed with fillers and who knows what else. It is actually quite easy to whip up a batch!
Ingredient Options
  • 2 cups Oats (the quick kind, not the old fashioned)
  • 2 cups Rice cereal (like the kind to make rice crispy's)
  • 1/2 cup peanuts (or any other kind of nuts)
  • 1/2 cup chocolate chips (semi-sweet, milk, butter scotch, white, any will do) You can also use M&M's
  • 1/2 cup dried fruit
  • 1 cup shredded, sweetened coconut
  • 1/4 cup maple syrup or honey
  • 1/4 cup peanut butter
  • 1/2 cup raisins
  • Anything else you can come up with

All but the top two are optional. It's your choice! Mix all of your choice of ingredients together (holding back the chocolate chips, raisins and dried fruit till after cooking). Once mixed well, pour it out onto a cookie sheet. You may need two, just make sure it is no thicker than 1/2 inch.

Granola before toasting.

Place the granola in an oven heated to 250 degrees. Toast it for 15 minutes, stir, toast again for 15 minutes, stir, toast, stir... Well, you get the point. Do this pattern till you have toasted the mix for 45 minutes to an hour. 45 minutes usually does it for me. Allow to completely cool before mixing in the dried fruit, chocolate, and/or raisins. Store in a sealed container. I keep mine in an old oats container.


The finished product!
Serve on yogurt, as cereal with milk, or just as is. It will keep on the counter for 2 to 4 weeks, but ours never seems to stay around that long. :o)


Saturday, February 13, 2010

Pumpkin Bread

Ok, can I just say "Yum!" I think I could eat this picture!


Honest, it tastes even better than it looks!

I figured since I taught you how to cook and clean a pumpkin, I should give you something to do with it. And if you don't feel like making the pumpkin yourself, feel free to buy a can! I'll never know! :o)

This is a super easy bread recipe. It reminds me of a zucchini or banana nut bread in that is it really moist and, like the zucchini bread, has a good spice to it.

Ingredients:
2 cups fresh or canned pumpkin (this is one regular sized can)
1/2 cup vegetable oil (or canola, that's what I use)
1 egg
2 cups sugar
3/4 tsp. cinnamon (more if you like)
1/2 tsp. pumpkin spice (more if you like)
3/4 tsp. salt
2 tsp. baking soda
2 1/2 cups flour (white, wheat or half and half)
1/2 cup chopped nuts (optional)
1/2 cup raisins (optional)

Instructions:

1: Preheat oven to 350' on bake. Grease a bunt pan, one regular sized bread pan, or two mini bread pans. I would think you could do this in a muffin tin but I have never tried it to know how many it would make or how long to bake it. I would guess at least a dozen and probably 30 minutes.

2: Mix all but the last three ingredients together till smooth. Then add in the last three and mix till smooth again.

3: Pour into the pan/pans and spread evenly. For the bunt or regular sized bread pan-bake at 350' for 1 hour and 30 minutes. For the mini loafs- bake at 350' for 45 minutes to 1 hour.


You can't see it in the picture, but it was still steaming. :o) I am impatient!


4:Remove from oven and allow to cool for 10 minutes in the pan. Turn out onto a cutting board and force yourself to give it at least a few more minutes before cutting into and taking a big bite.
This is really good with a little butter on it! Have it for dessert, for breakfast along side bacon and eggs, or for an afternoon snack. It is yummy no matter when you try it! It's spicy, moist and you can still see little orange bits of pumpkin! Mmmm. I think I will go have me another piece now!